
Before you start
- You will need to download the Word Add-In from TMO, using the steps in this article: How to download the Word Add-In
- You need desktop Microsoft Word. PDFs and Word Online can’t be mapped.
- Editing a TMO document? Download it first.
- Editing your own document? Use your existing Word file.
Inserting a merge field
- In TMO, find the Field ID that you want to add to your template. Copy that Field ID.
- In the Word template, highlight the text you want to replace or click where the data should go, if blank.
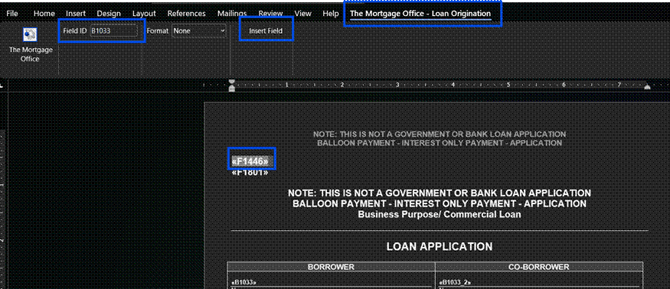
- In the Word ribbon, click the “The Mortgage Office – Loan Origination” tab.
- In Field ID box, paste the field ID, for example F1004.
- Click Insert Field. It should populate in the Word template like so: «F1004».
Common field IDs
|
Data |
Field ID |
|
Loan amount |
F1004 |
|
Note rate |
F1005 |
|
First borrower |
B1033 |
|
Second borrower |
B1033.2 |
|
All borrowers, joined with “and” |
B1434 |
|
Property street / city |
P1002 / P1003 |
TIP: For a second or third borrower, guarantor or property, add .2 or .3 to the ID, in the Field ID box on the Word ribbon, before inserting it into the template.
Using custom fields
If TMO doesn’t have a field for a data point needed on the Word template, create one.
- In a loan or a template, go to Custom Fields and click +.
- Name it (for example, Loan Processor), pick a type/format and click OK. Copy the Custom Field name.
- In the Word Add in tool Field ID box, type “UDF_” then paste the Custom Field name after the UDF_ plus the custom field name, with underscores for spaces. Example: UDF_LOAN_PROCESSOR.

Adding a bookmark
Certain tables (ex: the Payment Schedule) and signature blocks use a bookmark instead of a merge field. TMO builds the right signature lines for individuals and entities automatically.
- In the Word template, place your cursor where you’d like the signature line(s) to populate.
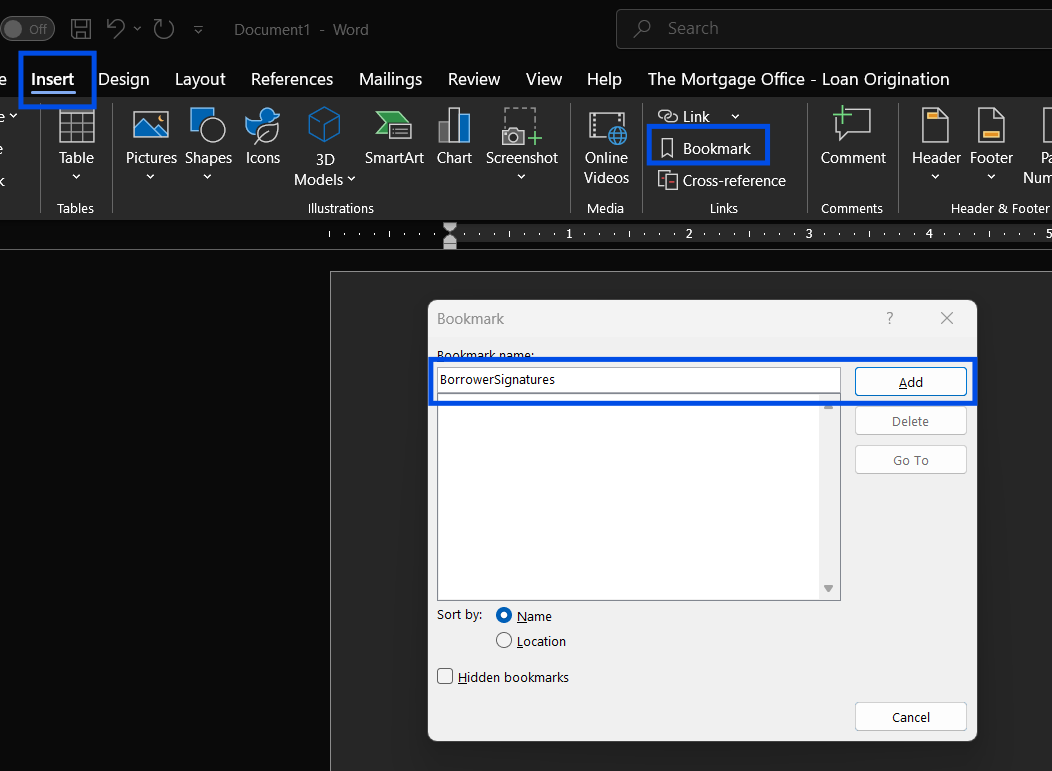
- In the Word ribbon, click Insert > Bookmark.
- Type the bookmark name. Ex: BorrowerSignatures or LenderSignatures exactly (no spaces).
- Click Add.
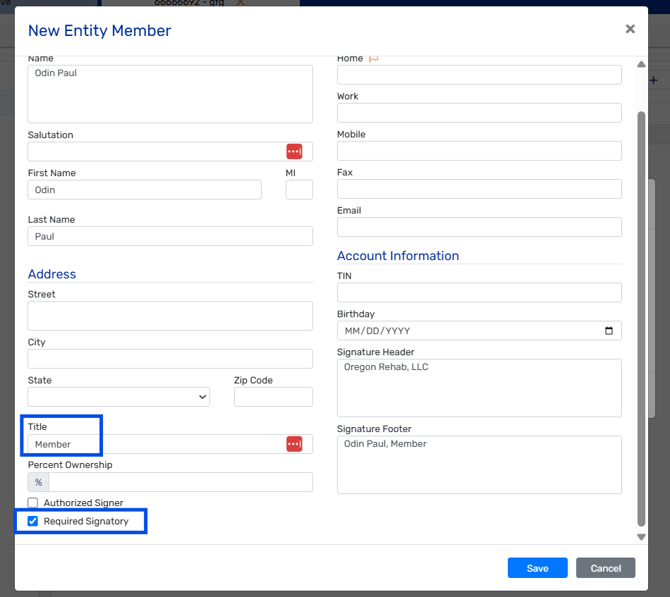
Tip: For entity borrowers, check the Required Signatory box for each signer on the borrower’s Entity Members tab, or they won’t appear in the block. Also remember to give the entity member the correct title.
Format a field (optional)
Right-click on field and choose Toggle Field Codes- you should see curly brackets instead of angle brackets:
Angle brackets: 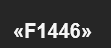
Curly brackets: 
Replace \* MERGEFORMAT with a switch code below, then right click and toggle back. You can manually type the text in, or you can copy and paste from this article.
|
To show |
Use |
|
$250,000.00 |
\# "$#,##0.00" |
|
10.50% |
\# "0.00%" |
|
ALL CAPS |
\* Upper |
|
September 24, 2026 |
\@ "MMMM d, yyyy" |
Note: There are many more switch codes that you can find online that can change formatting, spell out words, add conditional logic, etc.
Save the document for upload
- Click File > Save As.
- Set the file type to Word 97–2003 Template (.dot).
- Save it to a folder on your computer so you can find it easily when you upload it into TMO.
