
Step 1 — Sign In to the AWS Management Console
Navigate to signin.aws.amazon.com and sign in with your AWS account credentials.

AWS Sign-In page
Step 2 — Open SMTP Settings in Amazon SES
Once logged in, go to Amazon SES in the AWS console. In the left sidebar, select SMTP settings, then click Create SMTP credentials in the upper right.
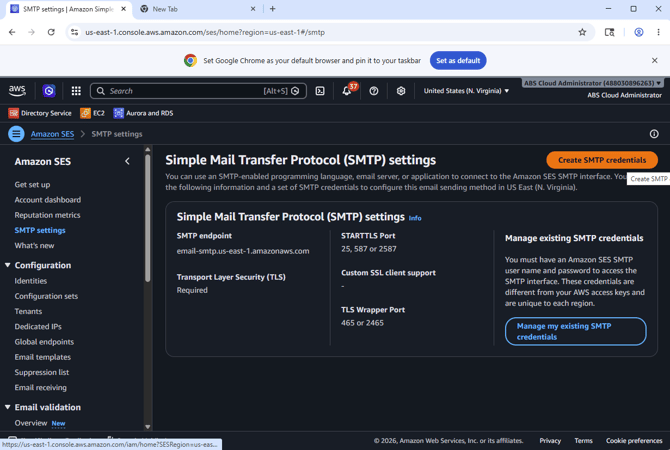
Amazon SES — SMTP Settings
Step 3 — Create an IAM User for SMTP
On the Create user for SMTP page, enter the company name in the User Name field. Do not include spaces in the username.
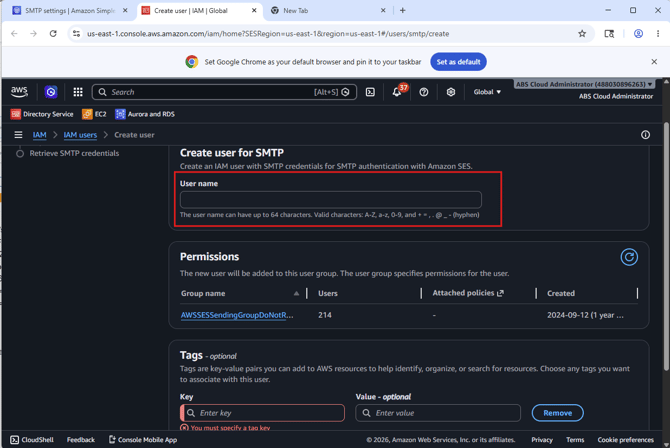
Enter a username (no spaces)
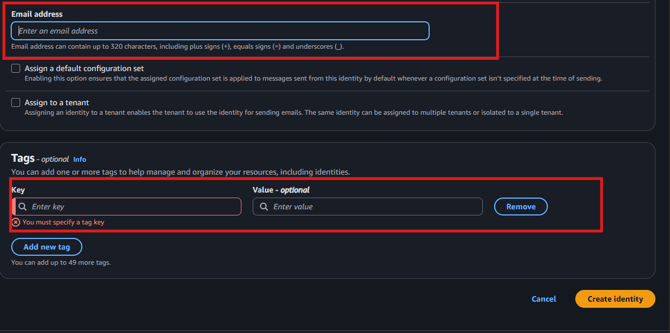
Step 4 — Add Tags
Scroll to the Tags section and enter the corresponding Key and Value pairs for your organization.
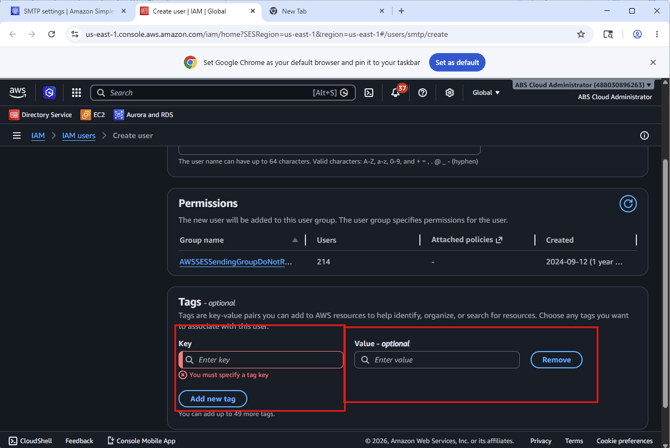
Enter your organization's tag key-value pairs
Step 5 — Save Your SMTP Credentials
Copy and store your SMTP username and SMTP password in a secure location (e.g., a password manager). You will need them in Step 11.
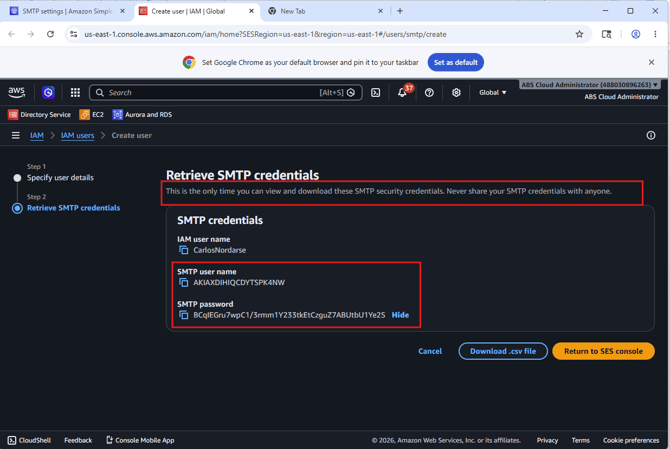
Save your SMTP credentials — only shown once
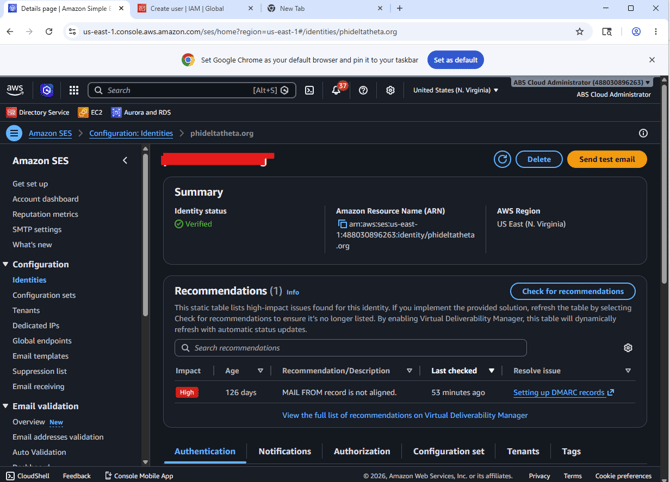
Step 6 — Navigate to Identities and Select Your Region
In the Amazon SES left sidebar, click Identities. Note the AWS region you plan to use for sending (e.g., us-east-1), then click Create identity.
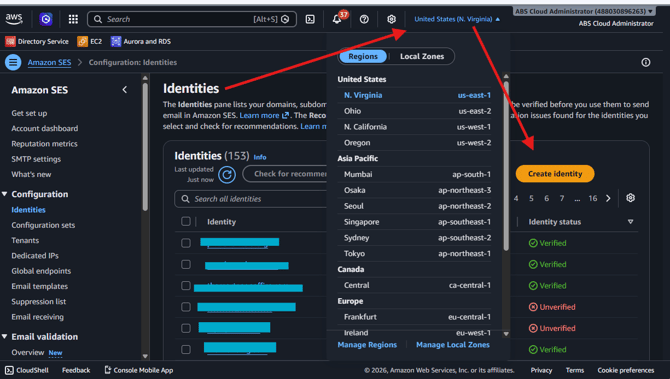
Select your region and click Create Identity
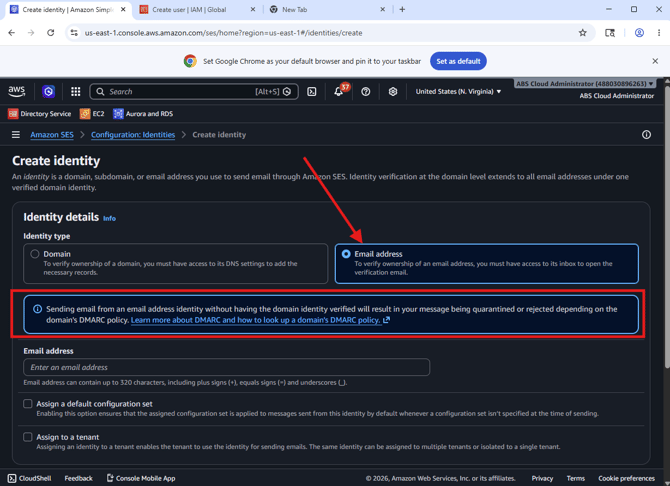
Step 7 — Select "Email Address" as Identity Type
On the Create identity page, select Email address to verify a single sending address.
Select 'Email Address' for single-address verification
Step 8 — Enter Your Email Address and Tags, Then Create Identity
Enter the email address you want to use for sending outbound emails from TMO. Add your tags from Step 4, then click Create identity.
Enter your sending email address and tags
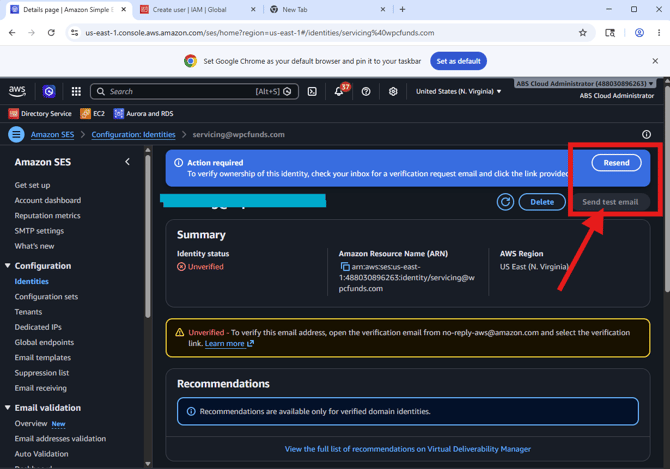
Step 9 — Verify Your Email Address
Amazon SES will send a verification email to the address you entered. Open that email, click the verification link, then return to the SES console and click Refresh.
Check your inbox and click the verification link, then refresh
Step 10 — Confirm Verification
Once the link has been clicked, the identity status will update to Verified. Your email is now authorized to send via Amazon SES.
Identity status updates to Verified
Step 11 — Enter SMTP Credentials in The Mortgage Office
In TMO, open Options and navigate to E-Mail > General tab. Enter your sending email address in the E-mail Address field.
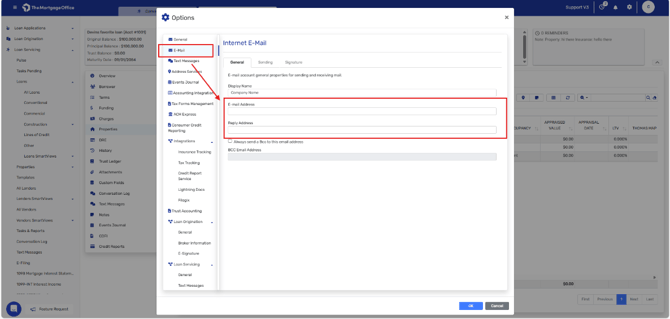
Enter your email address on the General tab
Click the Sending tab and enter the following settings:
| Field | Value |
|---|---|
| Email Provider | Other |
| SMTP Server | email-smtp.[your-region].amazonaws.comExample: email-smtp.us-east-1.amazonaws.com |
| Port | 587 |
| Secure Protocol | TLS / STARTTLS |
| Requires Authentication | ✓ Checked |
| Username | Your SMTP username from Step 5 |
| Password | Your SMTP password from Step 5 |
Click Test Account Settings to verify the connection, then click OK to save.
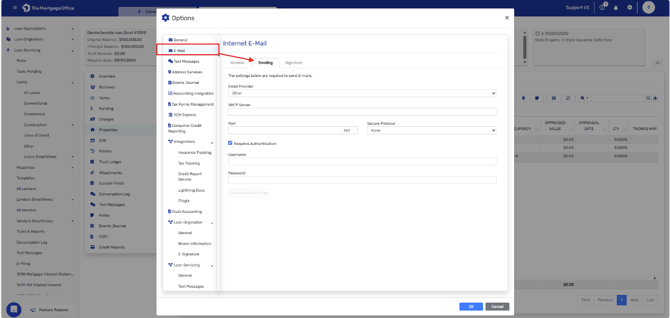
Enter your SES SMTP credentials on the Sending tab