
Skip to Section
Important Note: For early access, please contact your Account Manager.
Overview
The Data Export tool lets you pull your own data out of The Mortgage Office without a complex reporting request. You choose a starting (primary) dataset, optionally join related datasets to it, pick exactly which fields you want, rename and reorder those fields, apply filters, and download the result as a CSV file.
You can also save any export configuration as a template, so a report you build once can be re-run in a few clicks the next time you need it.
The workflow generally follows the same order:
- Select a primary dataset — the anchor for your export
- Join additional datasets (optional)
- Set a date range (optional, on history datasets)
- Choose your fields from each dataset
- Arrange and rename the selected fields
- Apply filters (optional)
- Export and download the CSV
Want to practice? Click here for an interactive tour.
Where to Find Data Export & Permissions
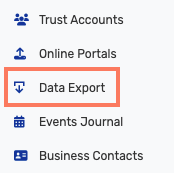 Select Data Export from the left-hand navigation menu. This functionality can also be found near the very bottom of Loan Servicing Tasks and Reports.
The Data Export page opens with the export toolbar in the upper right.

From this toolbar you can save your configuration as a template, reset your selections, open the filter panel, and run the export. The EXPORT button  becomes active once you have selected at least one field.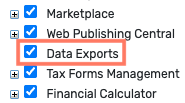
For a user to access Data Export, the Data Exports permission must be enabled for them. The Data Export feature does not check a user's other module permissions. A user without module access to Charges can still export the Charges History dataset.
That access applies within Data Export only. It does not change what the user can see anywhere else in TMO, and it is limited to the datasets and fields Data Export makes available.
Protecting sensitive data
Some values are always masked in an export, showing only the last four characters. This applies to every user and cannot be turned off.
- Tax identifiers (SSN, TIN, EIN)
- Bank account numbers
Step 1: Select a Primary Dataset
The primary dataset is the anchor for your export — everything else you add is joined to it. Click the dataset you want to start from.
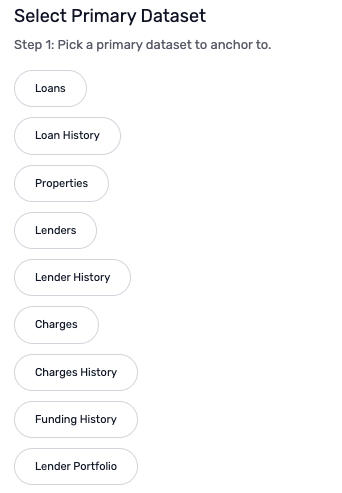
Available primary datasets are Loans, Loan History, Properties, Lenders, Lender History, Charges, Charges History, Funding History, and Lender Portfolio. To learn more about which fields are available with each dataset, please visit Technical Guide: Data Exports Available Field List.
Note: Your choice of primary dataset determines which additional datasets can be joined to it, so pick the one that best represents the rows you want in your export.
Step 2: Join Additional Datasets (Optional)
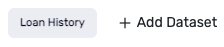
Once a primary dataset is selected, it appears as a tab, followed by an + Add Dataset option. Click + Add Dataset to join another dataset to your primary one.
The Select Dataset window lists the datasets available to join. Only datasets that are compatible with your primary dataset can be selected — incompatible options appear greyed out and cannot be chosen.
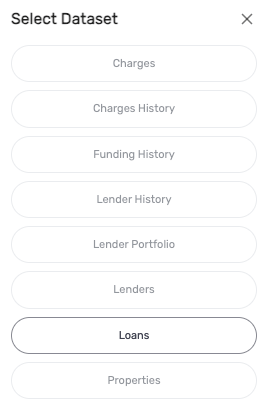
Each dataset you add appears as its own tab. Click a tab to switch to that dataset’s field list; click the X on a tab to remove that dataset from the export.

Step 3: Set a Date Range (Optional)
History datasets can return a large number of rows, so you can narrow them with a date range. With the dataset’s tab selected, click Set Date Range (Optional) above the field list.

Until you set a range, the export defaults to the past year from today for that dataset. Once a range is applied, the button changes to Date Range Set (Edit), which you can click again to adjust it.
Note: The Date Range filter here is only available for history related datasets, such as Loan History, Lender History, Charges History, and Funding History. For history related exports, the export tool generates up to a 1 year span, up to three years back, and does not support an "as of" date function.
The date fields you can filter also vary by dataset. For example, the Loan History dataset has different date filters than the Funding History dataset, and can use Date Received, Date Due, or Date Created.
Step 4: Choose Your Fields
The Available Fields panel lists every field in the currently selected dataset. Check the box next to a field to add it to your export. Use Select All to add every field in the dataset at once.
Switch between dataset tabs and repeat this for each dataset you added. Fields from all datasets are collected together in the Selected fields panel on the right.
Data Export doesn't currently support any calculated or aggregated fields.
Step 5: Arrange and Rename Your Columns
Everything you check appears in the Selected fields panel, tagged with the dataset it came from. This panel controls the column order of your CSV.
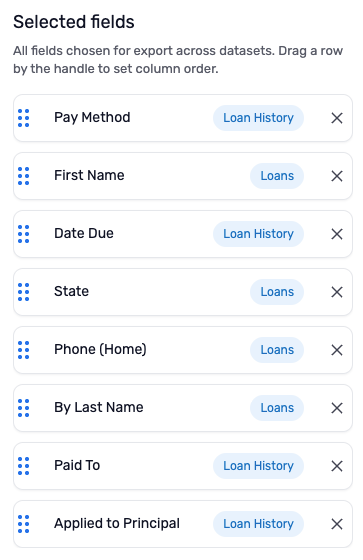
Reorder columns
Drag a row by the handle on its left to move it up or down. The top-to-bottom order here is the left-to-right column order in your export. Click the X on a row to remove that field.
Rename a field
To give a field a friendlier column heading, hover your cursor over the field name. A pencil icon appears — click it to make the name editable, then type the new name.

Check the original names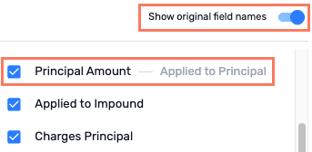
After you rename at least one field, a Show original field names toggle appears above the field list. Turn it on to display each renamed field alongside its original name, so you can confirm you edited the field you intended.
Step 6: Apply Filters (Optional)
To narrow your export by field values, click the filter icon in the toolbar in the upper right of the page.
In the Filter Data Export panel, build each filter from three parts: a Field, a Condition, and a Value. Click + Add another filter to stack additional conditions, or the red minus icon to remove one. If it is more efficient to search for a field instead of scrolling, that is supported when adding fields. Simply type in the field and matched fields will appear for selection.
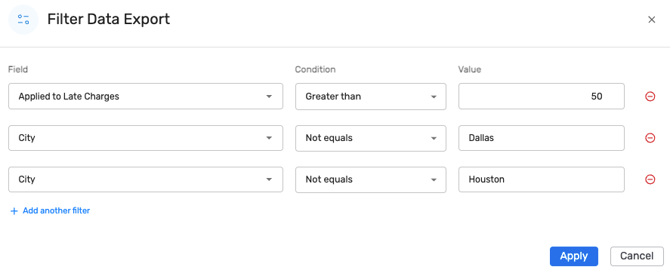
Notes: Multiple filters work as an AND and not an OR. Filters also support IN and NOT IN, which let you match several values at once. Enter the values separated by commas, for example: State IN CA, TX
Step 7: Export and Download
When your datasets, fields, column order, and filters are set, click the EXPORT button  in the upper right corner. The system has a concurrency limit of 3, preventing more that 3 exports from being performed at the same time, and is limited to 500,000 rows for any export.
The export is prepared in the background, so you are able to navigate to other areas of TMO, and can retrieve the export from the notifications tray when completed. When it finishes, a Processing Completed! window confirms that your export is ready and lists it by name.
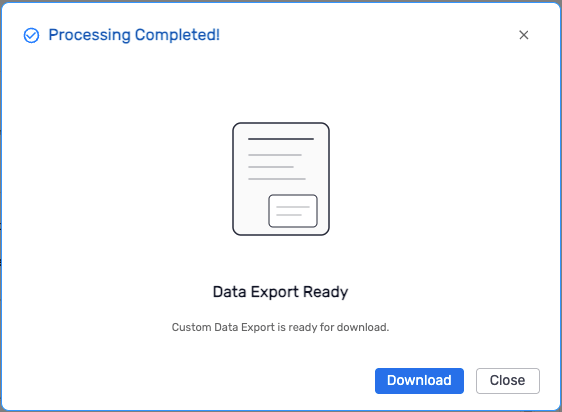
Click Download to save the CSV file, or Close to dismiss the window.
Completed Report Email Notification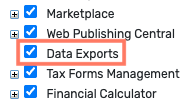
If you would like to receive an email notification when the report is ready, you can establish this option in your Profile settings.
The email lets you know your export is ready and prompts you to sign in to TMO to download it. For security, the file itself is not attached and no download link is included. Emails are sent for successful exports only.
Saving and Reusing an Export as a Template
If this is an export you expect to run again, save it instead of rebuilding it each time. A template stores your dataset selections, chosen fields, filters, set data ranges, column order, and renamed field names.
Save a template
With your export configured, click Save as Template in the toolbar.

Open a saved template
Once you have saved at least one template, a View Templates option appears next to the Data Export page title. Click it to retrieve a saved template and re-run that export.

Accessing your saved templates also allows you to Rename, Duplicate, or Delete a template.
Starting Over
To clear your datasets, fields, filters, and renamed columns and begin a new export from scratch, click Reset All in the toolbar.

Quick Reference
|
Control |
What it does |
|
Select Primary Dataset |
Chooses the anchor dataset for the export. Required first step. |
|
+ Add Dataset |
Joins a compatible dataset to your primary dataset. Incompatible datasets are greyed out. |
|
Dataset tabs |
Switch between the field lists of each added dataset. The X removes a dataset. |
|
Set Date Range (Optional) |
Limits the rows returned for the Loan History, Lender History, Charges History, and Funding History datasets. |
|
Available Fields / Select All |
Check individual fields, or add every field in the dataset, to your export. |
|
Selected fields |
All chosen fields across every dataset. Drag by the handle to set column order; X removes a field. |
|
Pencil icon (on hover) |
Renames a field so it exports under a friendlier column heading. |
|
Show original field names |
Displays renamed fields next to their original names for reference. |
|
Filter icon |
Opens the Filter Data Export panel to filter by Fields, Condition, and Value. |
|
Save as Template |
Saves the current configuration for reuse. |
|
View Templates |
Retrieves a previously saved template. |
|
Reset All |
Clears all selections and starts a new export. |
|
EXPORT |
Runs the export, then offers the finished file as a CSV download. |