
NOTE: This article assumes that you already have downloaded the Microsoft Word add-in. Click here for instructions on how to do that.
To customize a document in Loan Origination:
- Click on
 Loan Origination from the menu on the left panel of The Mortgage Office®.
 - Click the System Administration drop-down.
- Click the Document Maintenance drop-down:
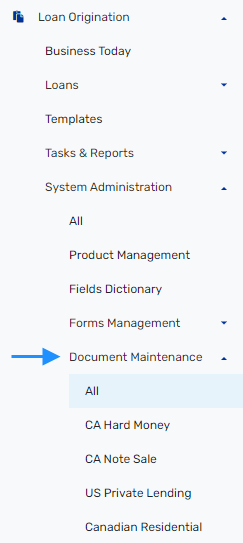
- Click All or click the loan product the document belongs to from the drop-down list. The options are:
- CA Hard Money
- CA Note Sale
- US Private Lending
- Canadian Residential
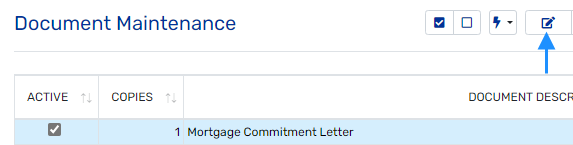
- In the Document Maintenance grid, select the document you want to edit by clicking on it.
- Click
 Edit:
Edit:
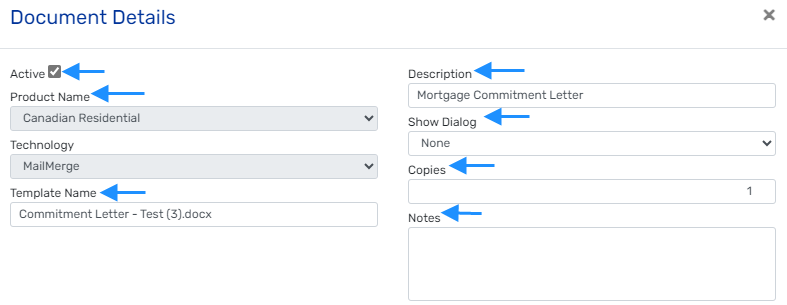
- Change the information in the Document Details assistant, using information in the table below:
|
Field: |
Description: |
|
Active |
Check this option to display the document or uncheck to hide it. |
|
Product Name |
Select the loan product this document belongs to from the drop-down list. TIP: This field is only enabled if you selected All Products from the Toolbar; otherwise, the product is selected and the field disabled.
|
|
Technology |
At this time Mail Merge is the only option for technology to use to generate the document. |
|
Template Name |
Enter the name of the document here. |
|
Description |
Enter a description for the document. (Maximum of 255 characters) TIP: The document's description is used throughout the system for identification and when selecting this document for printing. |
|
Show Dialog |
Select the dialog window that displays before printing this document. The options are:
TIP: The dialog window is used when the document applies to a collection, and you may want to print the document for one or more members of the collection. For example, a borrower type document where you may want to print it for a single borrower, selected borrowers, or all borrowers in the loan. |
|
Copies |
Enter the default number of copies. TIP: For example, you are required to provide 2 copies of TILA's Notice of Right to Cancel to each borrower in the loan. Therefore, enter 2 for this document to print the required number of copies by default. |
|
Notes |
Enter any document notes you need to explain the use or purpose of this document. |
- Once you've changed the information in the Document Details assistant, click
 Download.

- Open the document that was downloaded to your computer.
TIP: You may have to open your file explorer and the Downloads folder to access the downloaded document.
- Watch the video below for a walk through of the steps above:
Use the Microsoft Word add-in to add or change fields:
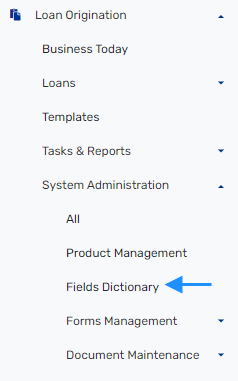
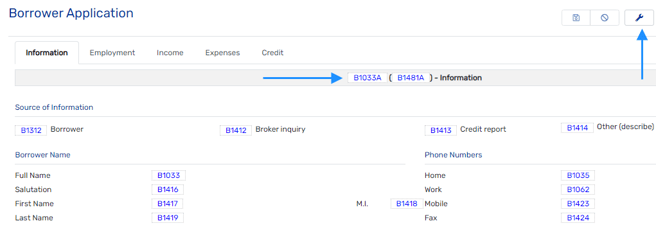
- Use the Fields Dictionary in The Mortgage Office® to find the field you want to add into the document or click the
 wrench within a loan form to show the field IDs for each field within the form:
-
- Fields Dictionary:
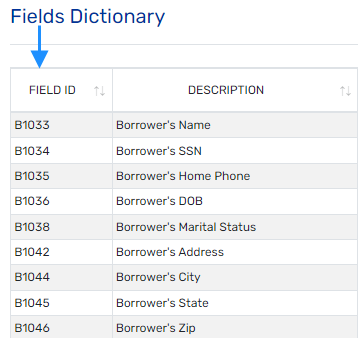
TIP: The Fields Dictionary is found under the System Administration drop-down, which is under the Loan Origination drop-down.
-
- Loan form:
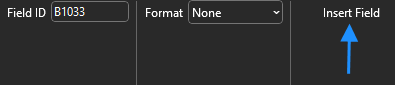
- Copy the Field ID from the Fields Dictionary or the loan form and paste it the Field ID box in the Word add-in, in the ribbon at the top of the Word document:

TIP: You are able to add custom fields to the document. To do this, enter "UDF_custom_field" using underscores for any spaces, into the Field ID box.
For example: if the custom field is "Bank Name", you would type the field: "UDF_Bank_Name" into the Field ID box then press Insert Field.
- Format the Field ID, though this is optional.

- Click Insert Field to insert the Field ID:
NOTE: The process above can be used to add new Field IDs to a document like described above, or to replace Field IDs within a document; just select the current Field ID and insert the new Field ID over the current one using the process above.
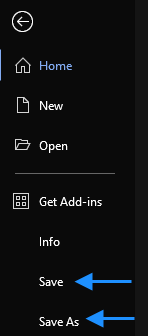
- Once you're done customizing the document to your liking, save the document to your computer:
- In The Mortgage Office® Document Details assistant, under the Upload Here section, click Browse:

- Browse your computer & find the document that you customized and saved to your computer.
- Select the document and click Open or double click the document to attach it to the Document Details assistant for uploading:


- Click
 Save to save the customized document to The Mortgage Office® or Cancel to abort the changes.
- Watch the video below for a walk through of the steps above:
Copyright © Applied Business Software, Inc. All Rights Reserved.