
Part 1: Activating the Integration
Note: This option isn't available by default. For access to the Doss Docs integration, contact your Account Manager.
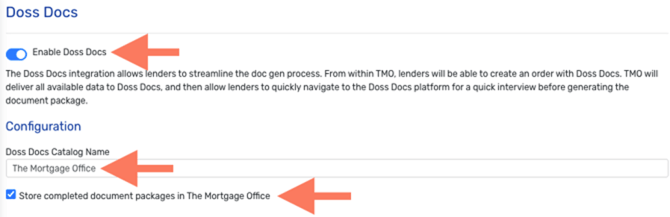
- Click the gear/settings icon in the top right corner of TMO, then find the Integrations section and select Doss Docs.
- Flip the toggle at the top of the page to On.
- Enter your TMO catalog name — for example, "The Mortgage Office."
- Check the box to store completed document packages in TMO, if you'd like the finished documents to also land in your Attachments automatically.
- Click OK at the bottom to save the change and exit Options.
Part 2: Entering Loan Data for Doss Docs
Borrower Fields:
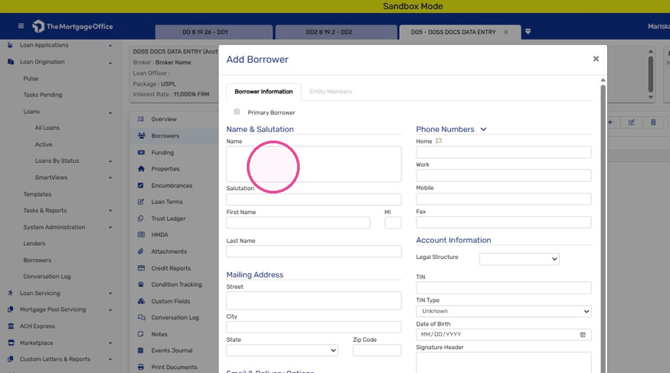
Borrower fields in Doss Docs are usually completed when adding a borrower in TMO, and include:
- Full Name
- Mailing Address
- TIN (SSN/EIN)
- Legal Structure
Entity Member Fields (If Borrower Is an Entity):
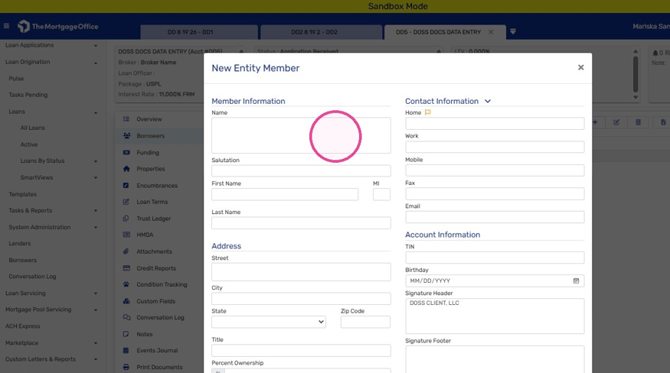
If the borrower is an entity, the following Entity Member information goes to Doss:
- Signer Name
- Signer Email
Note: Signer's Title does not transfer to Doss.
Note: Contact information for entity signers lives in the Entity Member data entry in TMO, but is not sent to Doss — it's up to you whether you want it in your loan file, but it won't appear in the Doss Docs record.
Single vs. Multi-Lender (Funding Tab):
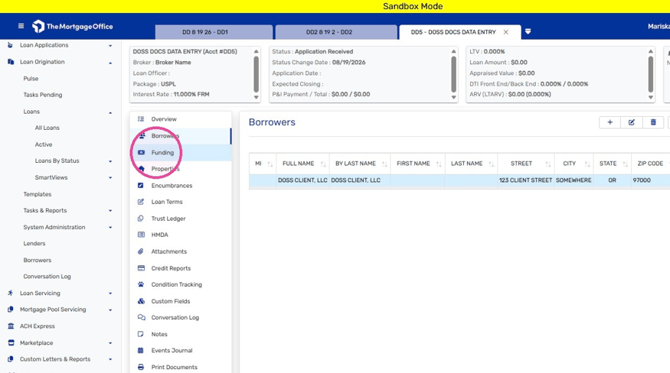
- To indicate whether it's a single- or multi-lender loan in Doss Docs, go to the Funding tab and enter your funding lender(s).
- Entering one lender toggles the "Single Lender" button in Doss Docs; entering more than one toggles the "Multiple Lender" button.
Property Fields:
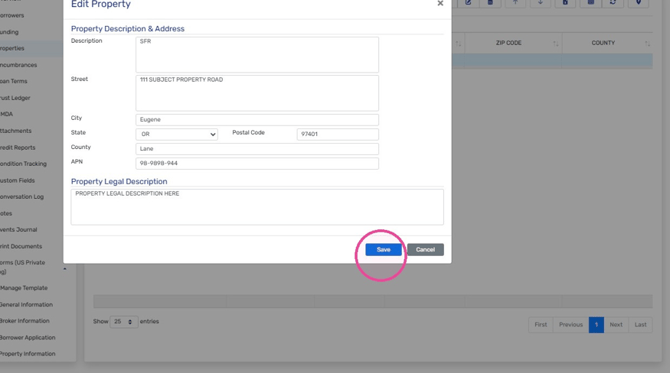
For property fields to transfer to Doss Docs, navigate to Properties and complete:
- Street Address
- City
- State
- Zip
- APN
- Legal Description
Encumbrances (Payoffs):
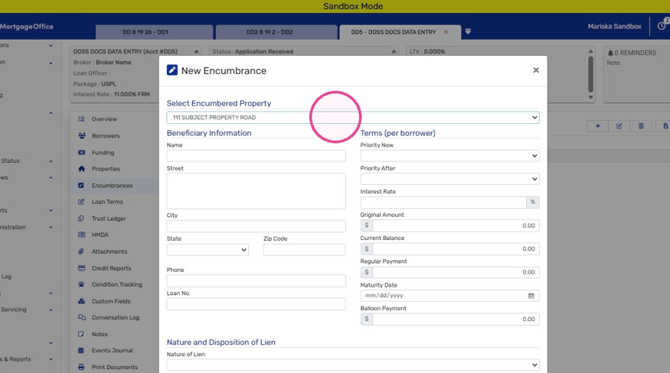
- To indicate payoff amounts and parties of liens currently against the property(ies), click Encumbrances and complete the encumbrance screen(s). If you don't have any payoffs, skip this step.
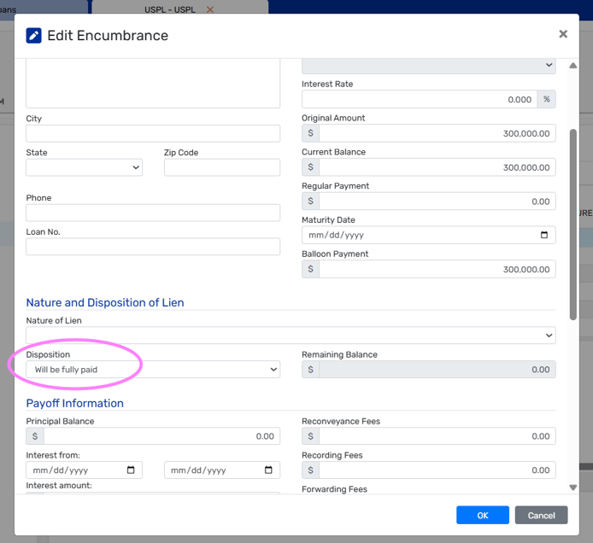
Note: The payoff amount is pulled from the Current Balance field — don't forget to scroll far enough to indicate that the loan will be paid in full.
Loan Terms:
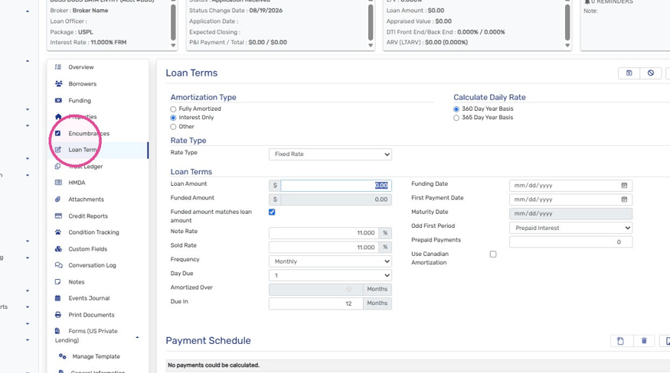
Click into Loan Terms to open the page where the following fields transfer to Doss Docs:
- Loan Amount
- Note Rate
- Amortization Type/Period
- Daily Rate Calculation
- Funding/Closing Date
- Whether you have an Odd First Period or collect Prepaid Interest
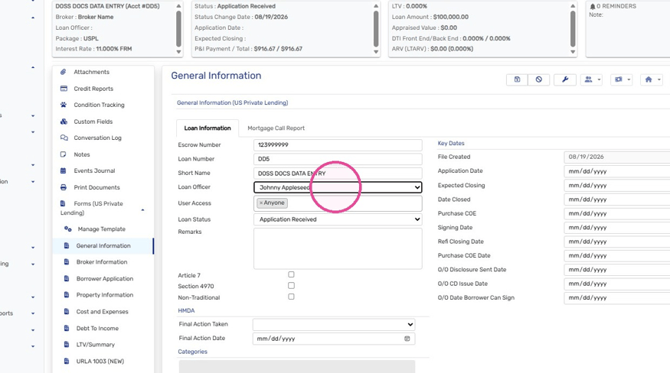
Loan Officer (General Information):
- Click General Information to select your Loan Officer from the dropdown.
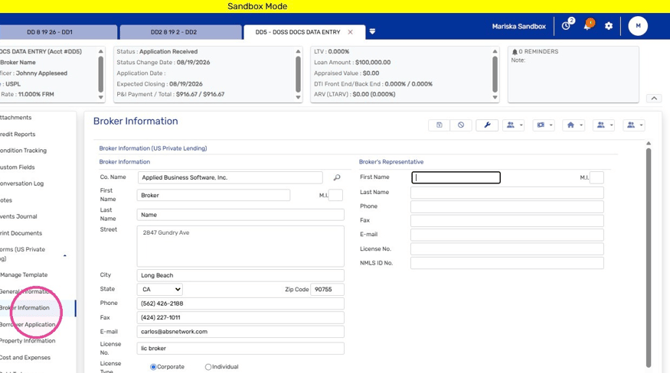
Broker Information:
- Click Broker Information if you have a 3rd-party broker, or to verify how your company's name will transfer to Doss Docs.
Note: The Broker Information and Broker's Representative fields here are you, the client. If you scroll down, you'll see a Referring Broker field — that's the 3rd-party broker who sent you the deal.
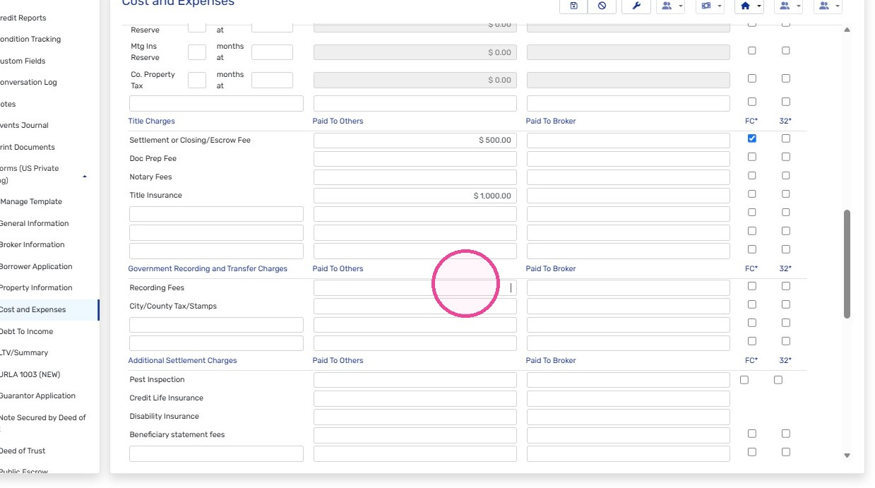
Cost and Expenses:
- Click Cost and Expenses/Fees Costs & Expenses to enter fees and costs associated with the loan.
Note: Because fee categories and terminology differ between "broker," "lender," etc., most fees need to be entered directly into Doss Docs. A few — Credit, Tax Servicing, and Appraisal — do transfer over.
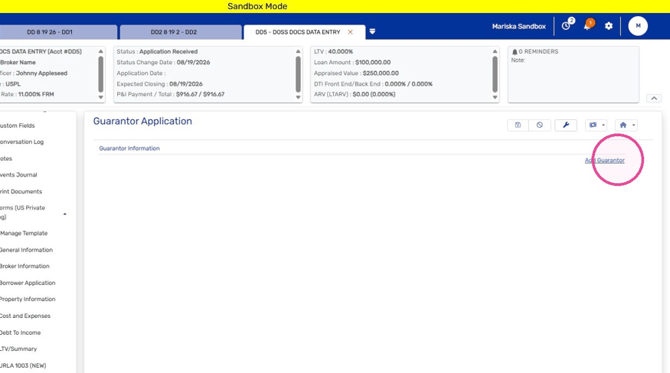
Guarantor Application:
- Click Guarantor Application and Add Guarantor (if you haven't already) if you have a guarantor on your loan who is producing documents for a personal guaranty, or who has a guarantor signing.
Note: A Guarantor is not the same thing as an entity signer. An entity borrower requires a signer since an entity can't sign — but if you also have a Guarantor (even if it's the same person signing on behalf of the entity), they should be entered here so they carry over to the Doss Docs section(s) for a personal guaranty.
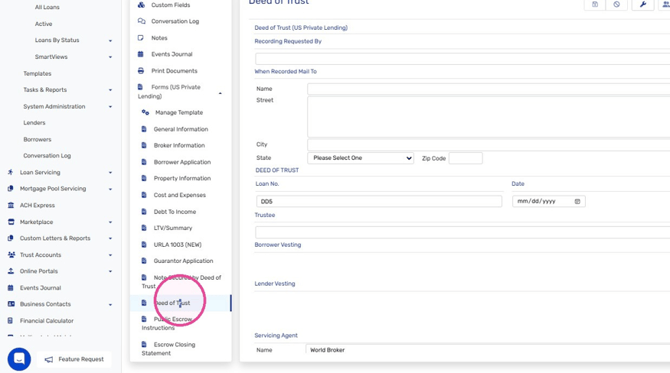
Deed of Trust:
Click Deed of Trust to access more fields that transfer to Doss Docs, including:
- Borrower Vesting
- Trustee
- "Mail to After Recording" contact name and info
- Servicing Agent
Public Escrow Instructions:
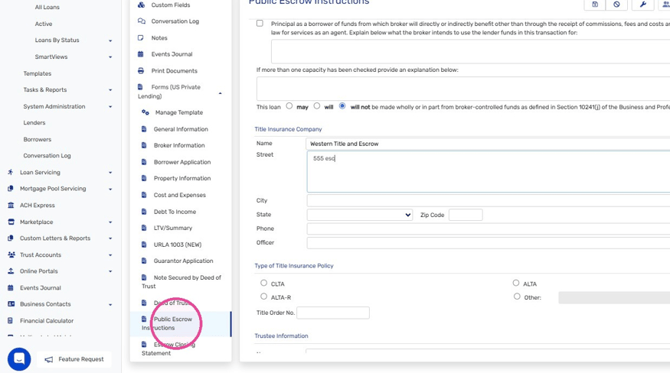
Click Public Escrow Instructions for the following fields to transfer to Doss Docs:
- Title Insurance Company
- Title Insurance contact info
- Title Officer
- Trustee for a Deed of Trust
- Escrow Company (if separate from title)
- Escrow contact information
- Escrow Officer
Note: "Broker Controlled Escrow Instructions" is also available in TMO and includes all of the fields above except Escrow, since it assumes the TMO client is performing the closing themselves or through their own agent.
Part 3: Ordering & Completing Doss Docs
Opening Your Doss Docs Record:
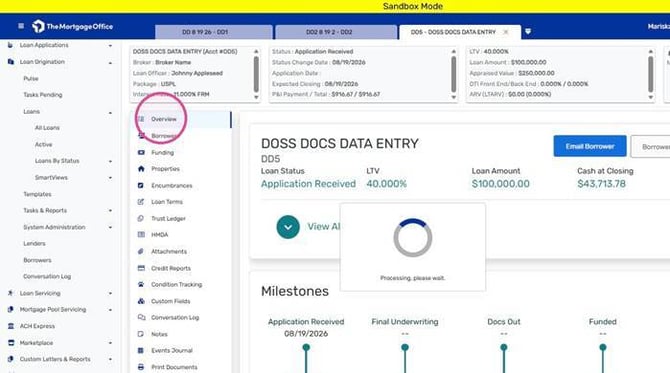
- Once you're done completing your loan record and the fields for closing docs described above, click Overview to access the tool to open your record in Doss Docs.
Ordering Doss Docs:
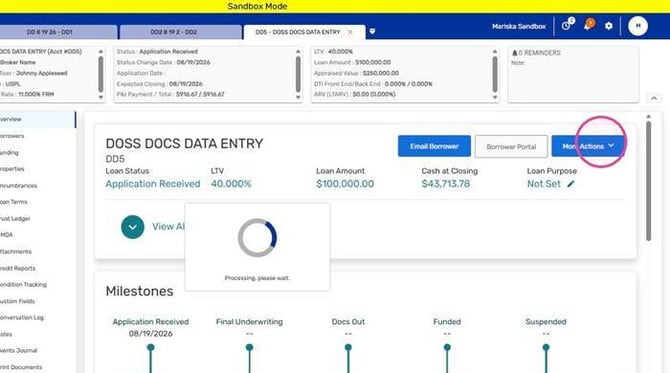
- From the loan's Overview page, click More Actions and select Order Doss Docs from the dropdown. This sends the loan's data to Doss Docs to begin the document generation process.
Navigating & Completing the Interview in Doss Docs:
- Your browser will open directly to Doss Docs and begin the interview steps for that Doss Docs record — there are no unnecessary extra steps for exporting, etc.
- The left-side menu guides you through each step, starting with Lender Information and progressing through Title Data, Loan Details, and more, ending at Review. The workspace on the right shows the data for whichever step you're on.
- Continue and complete your interview in Doss Docs; the finished documents will return to TMO automatically in your Attachments, as long as you toggled that setting on, in the database Options.
Note: Data synced from TMO will appear pre-filled in Doss Docs but review every page carefully. Due to some conditional inputs, it's possible that not all values will transfer.
Note: For questions on completing the Doss Docs interview, contact their support team at support@dossdocs.com and they can guide you through any steps within Doss Docs.
Part 4: Reviewing, Editing & Receiving Completed Docs
Reviewing & Editing Before Final Generation:
- The last step in the interview is a full review of all loan data for accuracy.
- If anything needs a correction, select the pencil icon next to that item — this takes you to that section so the change can be made and saved.
Tip: After saving a change, select Continue at the bottom of the page to return directly to the Review step.
Note: Payment is submitted per document set, prior to the final step. Subsequent redraws of the same doc set do not require an additional charge.
Receiving the Completed Documents:
Once complete, the finished loan documents are available in several ways:
- Automatically returned to the loan file's Attachments in TMO
- Downloaded directly from the Doss Docs confirmation page
- Emailed to a specified address
- Downloaded as a single ZIP file
Quick Tips
- Doss Docs isn't available by default — it needs to be activated in Options, and your Account Manager can grant access if you don't see it.
- A Guarantor and an entity signer are not the same thing — a Guarantor must be added separately to carry over to the personal guaranty section(s) in Doss Docs.
- Most fee line items need to be entered directly in Doss Docs — only Credit, Tax Servicing, and Appraisal fees transfer from Cost and Expenses.
- Encumbrance payoff amounts pull from the Current Balance field — scroll down to mark a lien as paid in full if applicable.
- Review every pre-filled page in the Doss Docs interview — conditional fields don't always transfer from TMO.
- Only the first document set is charged — redrawing the same set afterward doesn't require an additional payment.
- Finished documents come back four ways: automatically into TMO's Attachments, a download from the Doss Docs confirmation page, email, or a ZIP file.
- Stuck inside the Doss Docs interview itself? Contact support@dossdocs.com rather than TMO support.
Questions about the Doss Docs integration? Reach out to your account manager or the TMO support team any time.